 Skip to content


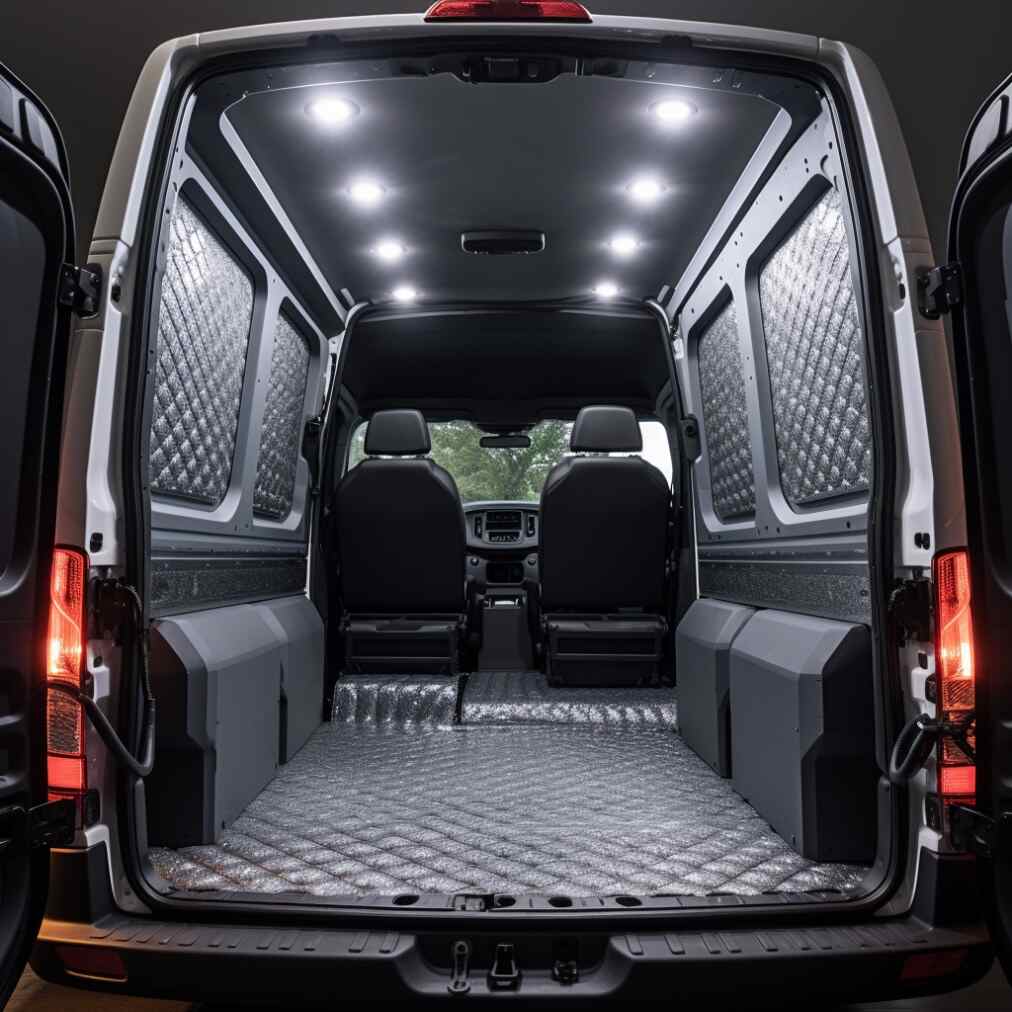
Installing van flooring is a crucial step to your DIY conversion. Almost everything you add to your rig after fitting the floor will be screwed to it, so it better be strong and watertight. Having an even, solid, well-insulated and comfortable floor in your home on wheels is essential if you want to hit the road often.
Sara and Philip from Meander Explorers recommend taking your time to choose and install van flooring because it’s not easy to replace, especially if you opt for gluing the top layer onto the subfloor. This is the case of sheet vinyl, cork tiles and other materials.
But before we look at the fun flooring options you can choose from and how to fit them, we should talk about what goes underneath it, which is a lot more important.
do you need to insulate van floor?
Absolutely! Flooring insulation is fundamental to keeping your van cozy. It will prevent heat and cold from traveling through the undercarriage into the cabin. Floor insulation will also allow you to build an energy-efficient camper van because you won’t lose any heat from a heater or cool air from an AC unit. Finally, insulation will help reduce road noise inside the vehicle.
So you should definitely insulate your camper van floor. No doubt.
How do you insulate a van floor?
To insulate a van floor you’ll need to stick insulation sheets to the metal floor, lay wooden beams for support, fit insulation boards between the stips, and attach a plywood subfloor to the structure.
Insulating van flooring takes about a day of work. If you’ve never done it before you’ll probably make some mistakes and you might need to recut some pieces of wood, ply or foam boards along the way. It’s all part of the fun of DIY-ing.
Let’s look at how to insulate a van floor, step by step.
For this project you will need:
- A floor cleaner
- A good quality rust remover
- Insulation, such as Reflectix or Thinsulate
- Aluminum tape
- Wooden furring beams that match the height of the insulation
- A glue, like Sickaflex
- Foam board insulation, like XPS or polyiso board, or other insulation of your choice
- Plywood sheets
- Screws
- Drill
- Tools to remove the existing flooring, like paint scrapers and screwdrivers
- Circular saw or hand saw
- Heavy objects like bricks.
You can use this video where Greg Virgoe showing the right way for the Sprinter van flooring installation.
Now let’s go through this installation process step by step.
1) Remove the factory floor
First, you need to remove the existing floor. This is usually made out of wood composite, which has a lot of flex. Once you start installing furniture in your vehicle, it will likely bow or create bubbles. So just strip it out without any worries. Don’t throw it away though; you can use it as a template for your flooring.
2) Clean the metal floor
Before you do anything, give the metal floor a good scrub. If there’s any rust, treat any spots with a good quality rust removal treatment. If there are any holes, fill them with sealant and aluminum tape.
3) Measure the area and create a layout
At this stage, it’s important you take accurate measurements of the van’s floor and draw a plan for it. This will help you decide where to lay the materials you need for the project and how much to buy of each.
4) Lay strips of insulation
Next you want to close all the air pockets created by the troughs and ridges in the metal floor of most vans. Lay strips of an insulation sheet, like Reflectix, on the floor to cover all the troughs. Use foil tape on the ridges to create a seal. At this stage, make sure you also cover the wheel-wells with the insulation strips and tape them down at the edges.
5) Fit wooden furring beams
Once you’ve sealed all the air gaps, you’re ready to install the wooden furring strips. The height of these needs to match that of the insulation material you will use later on.
If you can, decide where to lay the beams based on your floor plan. This is because you will need to screw the furniture, as well as the floorboards, into the strips. Cut the beams to size using a circular saw, so they fit perfectly in the van. To make your life easier, you can label them so you won’t need to remember where they go.
Lay the beams horizontally and vertically on the floor. Use as many pieces of wood as you can, especially if you’re not trying to match your floor plan, so you can install the flooring and furniture sturdily.
Once you’re happy with the position of the beams, stick them to the floor using a glue, like Sickaflex. Avoid screwing the wood into the metal floor, as it will likely lead to water infiltration, mold and rust.
You can place heavy objects, like bricks, over the beams to help them stick to the floor. You can do this at this stage, if you plan to take a break from the project, or wait until the subfloor is in place.
6) Install foam board insulation
Next, you’re ready to fit the foam board insulation (or any other type of insulation you’ve chosen). Cut the boards to fit the spaces between the beams. You can use a handsaw for this. Don’t forget to wear a mask or you’ll inhale a lot of foam dust. Fit the boards in the cavities – there’s no need to fix them in place.
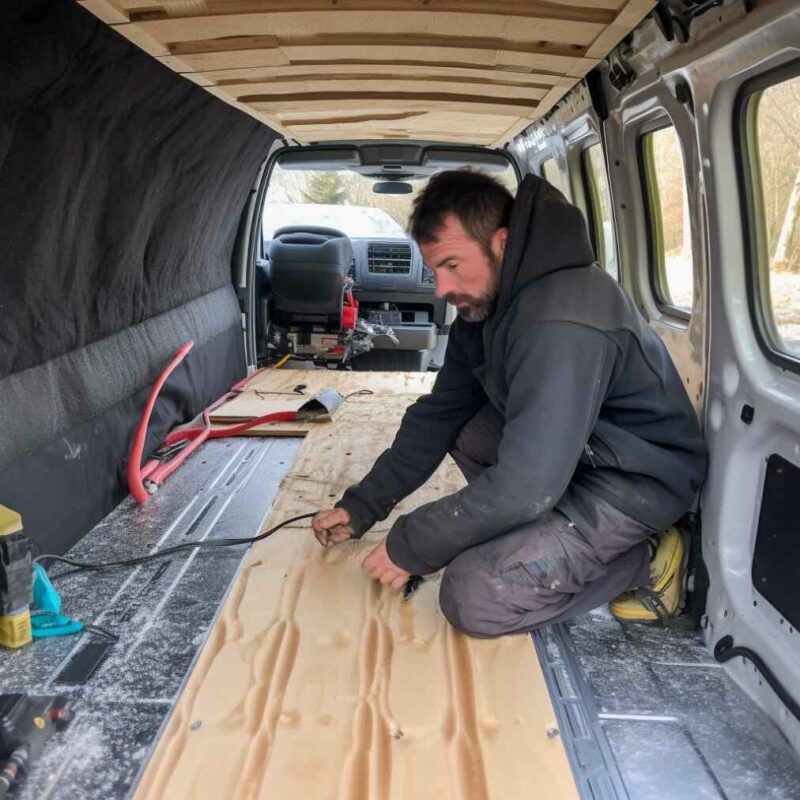
7) Fit a plywood subfloor
Finally, you’re ready to add a plywood subfloor. This will provide an even, solid surface on which to install the flooring material. Cut the ply sheets to size using the old floor as a template, so they cover the floor area. Place them over the wooden furring beams and screw them into it.
What thickness plywood for camper van floor should I use?
3/4 inch (18mm) 5-ply plywood is a commonly recommended thickness for van flooring. This thickness provides a sturdy base for your flooring, supporting the weight of furniture and occupants while maintaining durability.
There’s no need to go any thicker than 3/4 – it will just add weight to your rig.

how to fit false floor in van
Before we move onto the finished floor options, think about whether you’d like to install a false floor. A false floor can be super handy if you want to add a hidden storage solution to your camper van. It allows you to store items like camping chairs, tools and snow chains out of view.
A false floor doesn’t have to take much headroom and you can place it in strategic areas – think of the garage, under a platform bed, or the area in front of the sliding door.
Christie and Emily from This Pair Go There love their false floor because it allows them to keep their van neatly organized. They made their false floor more creative by adding slide-out benches and a pull-out table to it. The girls say their cozy picnic area at the back of their van makes everyone jealous at boondocking spots.
The process of adding a false floor is very similar to the one we just covered above. You’re basically creating a second, higher subfloor. Except, this one will have drawers coming out of it.
Here’s how to build a false floor:
- Create a layout that takes into account what sort of objects you want to store in the false floor, how big an area it will cover and the shape of the drawers you want to install.
- Fit supporting beams to support the false floor by screwing them into the wooden furring beams below.
- Measure the spaces between the beams and build drawers that fit into them. You can use plywood sheets. To save on space and complexity, don’t use drawer runners.
- Cut some plywood sheets to size and screw them into the beams. Leave enough space on the outer side so the drawer faces fit inside the van.
- If you like, cover the false floor with the same flooring material you will use for the rest of your van.
- Slide the drawers into their dedicated holes.
An important note: if you decide to install a false floor don’t skip insulating the area underneath it. It might be tempting to do it, but the lack of insulation in that area will affect the temperature in the whole van.
What are the best van flooring options?
Now that you have your subfloor and, possibly, a false floor, you’re ready to lay your favorite flooring material.
When choosing the material, bear in mind that you don’t need to lay the same floor across the whole vehicle. For example, you could choose a good-looking and cozy material for the living area and a rubber mat for the garage, where you’ll be storing muddy gear and heavy boxes. This makes practical sense and can even save you some cash.
Laminate
This has to be the most popular option when it comes to van flooring. Laminate is cheap, durable and strong. Plus it comes in many different styles and it’s sold in any DIY store. The only drawback to laminate is that it’s not waterproof and it’s prone to swelling due to moisture. So if you spill something on it you need to rush to wipe it off. And if you had a plumbing issue, you’d have to replace an area of the floor. That’s not ideal, especially if you travel full-time. Choose a high quality laminate rated for use in a bathroom if you can.
Laminate comes in tongue and groove planks. These are easy to interlock for a floating install, but you’ll need to cut the ones going around the edges of the van to size. That’s the hardest part of the install. It’s not rocket science, though, and if you kept the original composite floor you can use it as a template.
Sharrieff Fareed, also known as DualEx on YouTube, is a van self-conversion specialist with lots of builds under his belt. He’s a big fan of laminate flooring because it’s easy to install, light and cheap but it’s also durable. He recommends installing the laminate before you add any furniture to your build because it means you won’t have to add skirting board onto the furniture. Drilling the furniture into the laminate floor will also strengthen it and hold it all together. Your van will also look more professional.
Sheet vinyl
Another van lifer favorite flooring choice is sheet vinyl. This material is super thin, helping you make the most of the interior headroom in your van. This type of floor is waterproof, easy to clean and looks good. Installation is very easy: simply cut the sheets to size and stick them to the ply subfloor. Good quality sheet vinyl is relatively strong, so you shouldn’t worry about damaging it too much; however, it can be a little heavy.
In our book, there are two disadvantages to sheet vinyl. It’s very difficult to remove, as it’s stuck to the subfloor, and repairing a small portion of it is very hard. If you choose this option to save time on your flooring installation, cover the sheet vinyl with rugs to protect them.
Kristen from Barefoot Theory used high-density vinyl flooring for the living space of her second van (a 4×4 Mercedes Sprinter). It looks great, but the weave makes it hard to clean. She recommends going for a smooth texture that’s easy to sweep and wipe.
Luxury vinyl plank (LVP)
There are many benefits to LVP, which is why it’s being used in many homes these days. It’s easy to install, durable and easy to clean. Unlike laminate, it’s fully waterproof. It also looks nicer than other flooring materials, so it’s more expensive.
You can install LVP as a floating floor, like laminate, or apply a peel-and-stick product to the planks so you can stick them to the subfloor. A quick note of caution: removing LVP once it’s attached to the subfloor is very hard.
Cork flooring
Cork is an eco-friendly material that’s surprisingly durable and feels nice and soft underfoot. It also has sound-dampening and insulation properties, which is a huge plus. On top of it all, cork is water, fire, bug and mold resistant.
You can either buy cork sheets to glue to your subfloor or go for tongue and groove planks, which you can interlock for a floating installation. Once the sheets or planks are in place, you’ll need to seal them to keep the floor in good condition.
The big disadvantage of cork flooring is that it needs maintenance and it’s easy to scratch. You’ll have to reseal the tongue and groove every few years, which can be annoying. Cork also tends to be expensive, but as a van floor is pretty small, it won’t break the bank.
Holly and Sam from YouTube channel Holly & Sam used cork tiles to create a comfortable van floor for their VW T6. They love the look and feel of their floor, but are aware that they need to be careful not to drop any sharp objects on it. Holly recommends laying no more than two to four tiles at a time and using instant adhesive to glue the corners down.
Vinyl rubber flooring
Ok, rubber coin grip isn’t the best-looking material out there, but it’s extremely practical, tough and durable. It’s also fully waterproof. This type of flooring is ideal for a storage area like the garage, where you’ll be storing wet or muddy items, like surf boards and hiking boots.
Installation is super easy: just cut the sheets to size and place them on top of your subfloor. Job done. If you don’t screw any furniture through the rubber you can even take it out of the van to clean it.
Hardwood
Some van lifers choose the irresistible timeless look of hardwood flooring. It does look incredible, so we do understand why. Bear in mind that wood flooring can scratch easily, so you’ll want to install it in the living area only and walk around barefoot or in socks on it.
Before you choose hardwood, calculate how much the planks you’d need weigh. Real wood tends to weigh a lot, so it’s best to choose thinner planks.
If you plan to travel in humid climates, you might want to avoid hardwood, though. Wood absorbs moisture, so it can swell, warp or bow. This can create uneven flooring and even cause problems opening cupboards and cabinets.
How to put a wood floor in a van
Installing a wooden floor in your van isn’t hard, but can be time-consuming. First, glue the boards onto the subfloor with floor adhesive using a glue gun. Make sure to spread the adhesive evenly on the subfloor and on the planks using a notch trowel before you place the boards onto it. Press on the boards to help them stick to the floor and distribute the adhesive further.
To fit the flooring to the edges of the van you’ll need to cut the boards to match the shape of the perimeter of the vehicle. Leave a small gap between the planks and the sides of the van to allow for expansion.
Next, you’ll need to sand the floor down to raise the grain of the wood. Finally, coat the floor with a polyurethane finish. If any of the gaps you left for the wood expansion are visible once you’ve laid your furniture, hide them fitting some skirting board.
Marcel from Salty Vanventures used this method to create his dream hardwood floor on a Ford Transit and he’s very pleased with the result. He thinks the floor looks beautiful and he finds it holds up really well. He did notice the wood scratches a little; however, you can sand it down and apply the finish before there’s too much damage.
Carpet
Finally, you can opt for carpet. It’s pretty cheap and can make your van feel like home. However, it traps a lot of dirt, dust and debris, so you’ll need to carry a hoover on your van. Also, if you spill something on it, it’s very hard to clean.
If you can’t give up the idea of walking barefoot on a carpet inside your camper van, we recommend getting a big rug. That way you can shake it outside to clean it and replace it if it gets damaged.
To install carpet, simply cut the sheets into sections and staple them to the subfloor. Add metal transition strips at the edges. Et voila – you have a comfortable, soft floor that creates a cozy feel in your van.
Once your van flooring is installed, you’re ready to start adding furniture. Have you considered fitting a DIY conversion kit to save time?
At Van2B, we manufacture high-quality DIY camper van conversion kits including Mercedes Sprinter van conversion kits. There are also Transit van conversion kits and Promaster conversion kits.
We build van life beds, kitchen, and van cabinets out of premium materials from our workshop in San Diego, California. Assembling and installing them only takes four hours.
We deliver for free to the Lower 48.
Author

Our products
Beds
Mercedes Sprinter Van Murphy Bed
Beds
Ford Transit Van Murphy Bed
Beds
Ram Promaster Murphy Bed
Cabinets
Mercedes Sprinter Van Wheel Well Cabinets
Camper Van Cabinets
Ford Transit Van Wheel Well Cabinets
Cabinets
Ram Promaster Wheel Well Cabinets
Cabinets
Mercedes Sprinter Van Galley Cabinets
Camper Van Cabinets
Ford Transit Galley Cabinets
Posts you may like
Generative AI Envisions Ferrari Camper Vans
Jun
How to build a DIY camper van in 1 week
Feb
20+ Public Shower Places Near You While Traveling
Dec
The Future Design of Mercedes Sprinter: An AI Perspective
Jul
Ford Transit Camper Conversion Kit for DIY Van: Top 15
Jan
Van flooring: The complete guide
Jan
Free Van Bed Plans and Ideas to Build a Bed in a Van
Feb
Ford Transit vs Mercedes Sprinter reliability: side-by-side comparison
Feb